Guides
How to set up a workshop in a garage
Set up a garage workshop in this order: decide what happens to the car, measure the clear interior, run power to the machines before you buy them, plan dust collection, control heat and moisture, add light, lay out the floor, then build storage.
A 12 x 20 ft one-car bay with no car in it holds a hybrid saw, a bandsaw, a cyclone collector, a tool bench, a 6 ft workbench and a compressor, with about 176 sq ft of floor still open (our layout engine). Wire for the machines you will own in two years, not the two you are buying today.
Step 1: Decide what happens to the car
Every other choice in a garage shop follows from one question, and most guides skip it: does the car stay or go? A garage is a parking space first. A mid-size sedan is about 16 ft long and 6.2 ft wide, an SUV is about 16.5 ft by 6.5 ft, and a crew-cab truck is about 21 ft by 6.7 ft. Leave 12 in between the front of the vehicle and the door so the overhead door closes, keep about 30 in beside the vehicle to open the doors, and about 18 in at the ends. In a 12 x 20 ft bay a sedan leaves only 3 ft behind the front bumper. In a 12 x 22 ft bay it leaves 5 ft. A 21 ft truck does not fit a 20 ft deep bay with the door closed at all.
That arithmetic gives you three honest answers:
- The car lives outside. The garage is a shop and you plan the whole floor. This is the cleanest option and the only way to run a full-size cabinet saw in a one-car bay. See the 12 x 20 woodshop layout.
- The car stays and the shop rolls. Machines live on mobile bases against the walls and roll out when the car leaves, or the car comes in and they roll back. This is the mixed shop. See the 22 x 22 mixed layout and the beginner mixed setup.
- Two or three bays. One bay for the vehicle, the rest for the shop. A 22 x 22 ft two-car garage is the sweet spot: the engine fits a cabinet saw, a bandsaw, a cyclone, a tool bench, a 6 ft workbench, a miter station, shelving and a compressor and still reports about 387 sq ft of open floor.
Open the park-the-car calculator, enter your bay and your vehicle, and write down the strip behind the nose, the gap beside the doors and the deepest bench that still fits. Those three numbers are your real shop footprint.
Step 2: Measure the clear interior, not the slab
Builders quote the slab or the framing size. You need the clear interior, wall to wall after drywall, with the garage door tracks and opener rail subtracted from the ceiling. Measure these seven things and put them on one sheet:
- Clear width and clear depth at the floor, and again at 4 ft up in case the walls bow.
- Ceiling height to the lowest thing hanging down: the opener rail, the door springs, a light fixture, a water heater flue.
- Width of the overhead door opening, which is typically 9 ft on a single and 16 ft on a double. Large machines have to pass through it.
- Location of every existing outlet, the panel and any gas appliances.
- Where the floor slopes. Most garage slabs fall toward the door for drainage, and a table saw on a sloped floor never sits right.
- Windows and the side door, which are your light, your ventilation and your fire exit.
- Which walls are shared with living space. Those are your noise problem.
Then run the garage shop layout calculator with those numbers. It tells you which machines fit alone and which fit together, and it flags the ones that need more stock lane than the garage has. A rule that saves regret: for a table saw you need the machine depth plus 1.5 times the longest board you will cut. For 8 ft boards that is about 14 to 16 ft of clear run, which is why a table saw in a 20 ft deep bay is workable and one in a 12 ft wide bay is only workable along the long wall.
Not sure which bay you have? The layout pages cover six clear sizes from 12 x 20 ft to 32 x 24 ft, with the machines that fit each and the ones that were left out.
Step 3: Wire it before you buy the machines
Electrical is the step people do last and regret most. A typical garage has one or two 15 or 20 A circuits shared with the lights and the opener. That runs a drill and a router. It does not run a table saw, a dust collector and a compressor at once. Plan a dedicated circuit for each big motor, a few 20 A general-purpose outlets above bench height, and a subpanel if the run from the house panel is long or you need more than four or five circuits.
Here is the logic with the NEC numbers, all plain-text citations that a licensed electrician should confirm:
- NEC Table 430.248 gives single-phase full-load current. A 1-1/2 HP motor is 20 A at 115V and 10 A at 230V. A 2 HP is 24 A and 12 A. A 3 HP is 34 A and 17 A.
- The conductor is sized at 125 percent of that current (NEC 430.22). A 3 HP motor at 230V needs 21.3 A of capacity, so a 25 A breaker, and 10 AWG copper from the 60 C column of NEC Table 310.16.
- Voltage drop over a long run is estimated from NEC Chapter 9 Table 8 and kept under about 3 percent. The voltage drop calculator does the sum.
The workshop amps calculator adds up your machines and suggests a subpanel. For the woodshop package that fits a 12 x 20 ft bay the layout engine lists 76 A of connected 120V load and suggests a 60 A subpanel; for a 22 x 22 ft woodshop with a cabinet saw on 240V it lists 14 A at 240V plus 76 A at 120V and also lands at 60 A. A 24 x 24 ft woodshop with a 3 HP collector and a cabinet saw reaches 100 A. These are planning figures, not an electrical design. Read 240V in a garage explained and how many amps for a garage workshop before you call someone, and if you want an outlet today, how to install a 240V outlet in a garage walks through the job.
Electrical work can kill. Have a licensed electrician confirm and connect the panel end of every new circuit, and pull the permit your town requires.
Step 4: Plan dust collection and air before the first cut
Garages share air with a house when they are attached, and they share it with a car and its finish all the time. Fine wood dust is the thing you cannot see and cannot get out of a car's paint. Plan dust capture at the machine and a hanging filter for the rest. The standards data on this site uses 4,000 feet per minute duct velocity; at that speed a 4 in duct moves 349 CFM, 5 in moves 545, 6 in moves 785, 7 in moves 1,069 and 8 in moves 1,396. Machines ask for about 350 CFM at the hood for a table saw, bandsaw, jointer or router table, 400 for a planer, 550 for a sander and 200 for a drill press.
That makes the machine list your collector spec. One machine at a time through a 5 in duct is about 545 CFM, which fits a portable collector such as the Grizzly G0860 (868 CFM at 1.8 in static pressure on a 6 in intake, 1 micron canister, per the listing) or the POWERTEC 560 CFM portable. A fixed duct network in a larger shop wants the Grizzly G0441 (1,654 CFM at 2.0 in on an 8 in inlet, 240V). Use the dust collector calculator and the air filtration calculator, and read how to set up dust collection in a garage shop for the duct runs.
Wear a respirator regardless. A collector reduces the dust; it does not remove the need for a P100 half mask while sanding or sawing.
Step 5: Control heat, cold and moisture
A garage is the least insulated room in the house. Glue and finish want a shop above freezing, your hands want it warmer, and cast iron wants dry air. Insulate before you size a heater, because a heater sized to a leaky box is a heater that never stops. Using the site's heat-loss convention (R-13 walls, a bare ceiling, a steel door, average air leakage, 55F inside and 10F outside), the heat load is:
| Garage | Typical load | Electric kW | Upgraded insulation |
|---|---|---|---|
| 12 x 20 ft one-car | 8,500 BTU/h | 2.5 kW | 4,000 BTU/h |
| 20 x 20 ft two-car | 13,000 BTU/h | 4.0 kW | 6,000 BTU/h |
| 22 x 22 ft two-car | 15,500 BTU/h | 4.5 kW | 7,500 BTU/h |
| 24 x 24 ft two-car | 17,500 BTU/h | 5.5 kW | 8,500 BTU/h |
| 32 x 24 ft three-car | 24,500 BTU/h | 7.5 kW | 11,500 BTU/h |
Insulating the ceiling and the door roughly halves the load. Those are convention values, not measurements of your garage, and the heater calculator lets you change every input. For the heater itself read is a garage heater worth it and the best garage workshop heater. For summer, the mini-split cooling calculator adds the heat your machines make: every watt is 3.412 BTU per hour.
Moisture is the quiet killer. Warm humid air meeting cold iron rusts a table overnight. Keep the door closed in humid weather, run a 50 pint dehumidifier in a closed garage, and wipe cast iron with a corrosion protectant. See the best dehumidifier for a garage shop.
Step 6: Light it properly
A single bulb on the opener is not a shop light. The site's lighting convention is 50 footcandles for general work and 100 for detailed work, a coefficient of utilization of 0.6 and a light loss factor of 0.85. That works out to about 98 lumens per square foot for general work. A 12 x 20 ft bay (240 sq ft) wants about 23,500 lumens, which is roughly six 4 ft LED fixtures in the 4,400 lumen class such as the hykolity 4 ft shop light. A 22 x 22 ft garage (484 sq ft) wants about 47,500 lumens, roughly eleven. Double it over the bench and the saw if you do fine work.
Hang fixtures so they do not shadow the work: two rows running parallel to the long wall, one over the saw lane and one over the bench, is better than a ring around the edge. The shop lighting calculator and the best garage shop lights go deeper. Use 5000K, which reads as daylight and shows wood color accurately.
The first-weekend kit for any garage shop

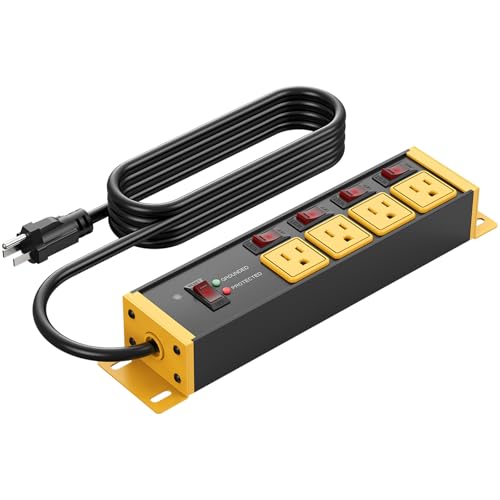



Prices change often; the button shows today's price on Amazon.
Amazon and Grizzly, side by side
Each card shows an Amazon pick and a Grizzly Industrial pick for the same job.
Hybrid table saw for a 120V garage

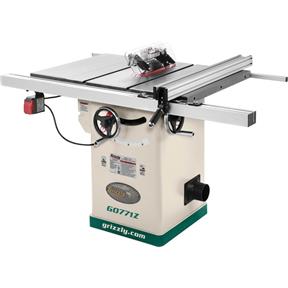
Both are 10 in saws in the 1-3/4 to 2 HP class. Pick Amazon for the SawStop contractor saw; pick Grizzly for an enclosed cabinet hybrid you can order direct and wire for 120V or 240V.
6 ft adjustable workbench

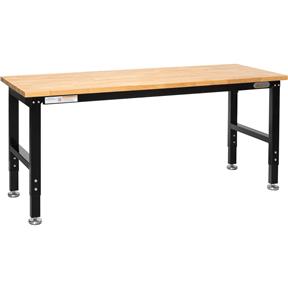
Choose the Amazon bench to keep spending down; choose the Grizzly bench when you run power tools on it every weekend and want the built-in outlets.
Cyclone dust collector for a one-man shop

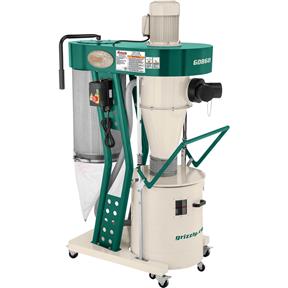
The Grizzly G0860 is a two-stage cyclone on 120V with a 1 micron canister; the Amazon pick is a bag-style 1 HP machine. The cyclone costs more and keeps the filter clean far longer.
Prices change often and Grizzly runs sales, so the buttons show current prices.
Step 7: Lay out the floor in zones and flow
Good layouts follow the work, not the catalog. Wood moves in at the door, gets cut, is surfaced, is assembled and leaves finished. So lay out in this order: the stock lane along the garage door wall, the saws on the long wall, the jointer and planer on a shared bench, assembly in the open center, finishing in the corner farthest from the dust.
- Keep 24 in clear in front of every machine as an operator zone, and 36 in for the main aisle. The engine uses 24 to 36 in depending on the machine.
- Put the dust collector near the machines it serves and on the wall, not in the traffic aisle. A cyclone stands about as tall as you do.
- Park the compressor in the corner you never use. It is the loudest machine in the shop.
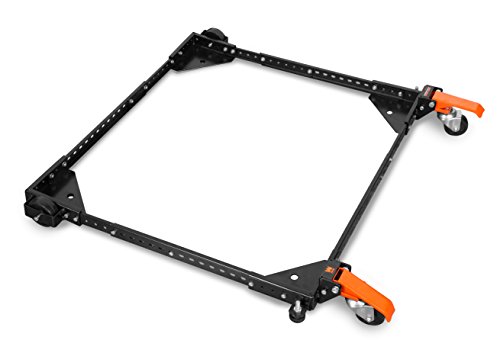
- Put heavy things on mobile bases and the bench against a wall, so the middle of the room stays flexible. A BORA PM-2500 fits a typical table saw; see the best mobile base for a table saw and the mobile base sizing calculator.
In a 12 x 20 woodshop the engine could not place a miter saw station or steel shelving once the saw, bandsaw, collector, tool bench, workbench and compressor were down. That is the honest tradeoff of a one-car bay, and the layout page shows what was left out. A 12 x 22 ft bay recovers the miter station; a 20 x 20 ft bay recovers the shelving too. Run your own bay through the layout calculator to see the same tradeoffs.
Step 8: Build storage up the walls and on wheels
Floor is the scarce resource, so store on the walls. A 4 ft pegboard panel next to the bench holds the hand tools you grab every ten minutes; a four-pack of metal pegboard panels covers a lot of wall. Closed cabinets such as the GREATMEET locking wall cabinet keep finishes, solvents and chemicals away from sparks and children. A 5-tier steel shelving unit (60 x 24 x 78 in per the listing) holds the stock and the bins. Put a rolling chest next to the bench; compare the Goplus and VEVOR chests on the tool chest page.
Think vertical and think in rolling units. Sheet goods lean against a wall rack, clamps hang from a rail, and a rolling cart holds the sander and the router so you can move them to the project. The workbench is the center of the shop; read the best garage workbench and workbench size for a one-car garage.
Step 9: Make it safe before it is busy
Safety equipment is cheap and the first thing to run out. Do these on day one:
- Mount a fire extinguisher by the exit and another near the finishing area. Rated 1-A:10-B:C covers common shop fires, but replace any that are old or discharged.
- Install a carbon monoxide alarm and a smoke alarm. Never run an engine in a closed garage.
- Test every outlet with a plug-in tester such as the Klein RT210. Garages need GFCI protection, which an electrician can confirm for your code cycle.
- Keep safety glasses and hearing protection at the door, not in a drawer.
- Store fuel, solvents and rags away from the water heater, the grinder and the welder. See the planning checklist.
- Make a plan for rags soaked in oil finish: lay them flat outside or in a sealed metal can of water. Those rags can heat up and ignite.
This is general information, not a safety inspection. Follow each manufacturer's manual and your local code.
The order to buy machines in
Resist buying six machines in the first month. Buy the work surface and the first cutting tool, then let the projects tell you what is missing. A sensible sequence for a woodshop is workbench, vise and clamps, drill press, table saw with a mobile base, dust collection, bandsaw, jointer and planer, then air filtration. For a first table saw the real choice is between a benchtop or jobsite saw you can roll away and a hybrid that stays; see jobsite saw vs hybrid saw for a garage. When each machine has a Grizzly equivalent we show both buttons, so you can compare. The beginner garage woodshop setup lists a complete first package, and the budget planner totals your own list.
The six-bay layout pages also show which of your machines will not fit. Check the fit sheets before you buy anything over 300 lb.
Common mistakes that cost a second weekend
- Buying the machine before checking the doorway. A cabinet saw crate has to get through the door. Measure the opening and the stairs.
- Wiring for today. A 20 A circuit that powers a 1 HP bandsaw does not power a 3 HP collector. Run conduit that can take more wire later.
- Forgetting the stock lane. Table saws need room behind them for the board you feed through.
- Letting the shop absorb the car's space. If the car must come in at night, nothing on the floor may be permanent.
- Skipping insulation. The heater takes the blame for what the walls did.
- No plan for dust. A cheap shop vac emptied every ten minutes is a plan, but it is a plan that fails in month three.
Get the garage shop planning checklist
One printable page: measure the bay, count the circuits, list the machines, check the floor. Plus a few short emails, then a couple a month at most.
Unsubscribe anytime. You can also just read the checklist on this site.Frequently asked questions
What do I need to set up a workshop in a garage?
Floor space once the car is counted, dedicated circuits, dust collection, light, heat and moisture control, a workbench and storage. Wire first, buy machines second. Measure the clear interior and run the layout calculator before you spend money on large tools.
How much space does a garage workshop need?
A 12 x 20 ft one-car garage holds a small woodshop with no car. A 22 x 22 ft two-car garage holds a full shop and a car. A table saw needs a stock lane of about 14 to 16 ft for 8 ft boards, which is the usual limiting factor.
Do I need 240V in a garage workshop?
Not to start. Most benchtop machines run on 120V. Motors over about 2 HP, large compressors and electric heaters are happier on 240V. Have a licensed electrician confirm the circuit.
Can I keep my car in the garage with a workshop?
In a two-car garage, yes, one bay each. In a one-car garage put machines on mobile bases and keep the center clear. A sedan leaves only 3 ft behind the bumper in a 12 x 20 ft bay.
What should I buy first for a garage workshop?
A sturdy workbench with a vise, then lighting and a fire extinguisher, then the one machine your first project needs. Dust collection and a respirator come with the first saw, not after it.
This page is researched guidance, not professional electrical, engineering or safety advice. Circuits, loads and clearances depend on your house, your service and your town: have a licensed electrician confirm any wiring, and check local code and each manufacturer's manual before you act.