Guides
How to install a 240V outlet in a garage
Installing a 240V outlet in a garage means choosing the load, sizing a double-pole breaker and copper wire for it (125 percent of the running current, NEC 430.22 and Table 310.16), picking a matching NEMA receptacle, running the cable from the panel, and getting it permitted and inspected.
A 3 HP motor draws 17 A at 230V (NEC Table 430.248), so it takes a 25 A breaker, 10 AWG copper and a NEMA 6-30 or 6-20 receptacle; a welder or EV charger takes a 50 A breaker, 6 AWG copper and a 6-50 or 14-50. This guide is planning information: have a licensed electrician confirm and connect the panel end.
Who does what: the honest split between DIY and electrician
The phrase "how to install a 240V outlet" covers two very different jobs. One is the planning: what the outlet is for, what breaker and wire it needs, what receptacle matches, where it goes, and what your panel can carry. You can do all of that yourself with the tables on this page and the site's calculators. The other is the physical work in the panel and in the walls, which carries real risk: a live panel can kill, a wrong breaker or an undersized wire can start a fire months later, and many places require a permit and inspection or a licensed electrician for any new circuit. Some places allow a homeowner to do the work with a permit; others do not. Ask your building department.
The best use of this page is to make you a better customer. Know the load, the breaker, the wire and the receptacle before the electrician arrives, and the quote will be for the right job. Read 240V in a garage explained for the theory and cost to install a 240V outlet in a garage for what drives the price.
This page does not tell you how to work inside a live panel, and it is not a substitute for the code adopted where you live. Have a licensed electrician confirm the design and make the connection at the panel.
Step 1: Decide what the outlet is for
Everything else follows from the load. Write down what will plug in, its horsepower or amps from the nameplate, and whether it needs a neutral. Typical 240V garage loads:
- A shop motor over about 2 HP. A cabinet table saw (the Grizzly G1023RL lists 14 A at 240V), a 3 HP cyclone (the G0441 lists 22 A), a large planer or a 5 HP compressor.
- A welder or plasma cutter. Most 200 A class MIG welders accept 110V or 220V; check the plug the manual calls for. The 6-50 is the common welder receptacle.
- An electric heater. A 4.5 kW heater draws 18.8 A at 240V, and a 7.5 kW heater 31.3 A, per the site's heat-load examples.
- An EV charger. A continuous load for hours; the outlet is often a 14-50. If you need both a charger and shop machines, give each its own circuit and ask the electrician to check the panel for the combined load.
- A large compressor. A 60 gallon, 2-stage unit such as the Campbell Hausfeld 60 gallon, 230V or the DEWALT 60 gallon.
Use the workshop amps calculator if there is more than one load, because the sum may call for a subpanel before an outlet.
Step 2: Find the breaker and wire from the NEC tables
Motor circuits are not sized by horsepower on the label. The code uses NEC Table 430.248, full-load current for single-phase motors, then sizes the conductor at 125 percent (NEC 430.22). The numbers the site's calculators use:
| Motor | Amps at 230V | 125 percent | Breaker | Copper wire (60 C column) |
|---|---|---|---|---|
| 1 HP | 8 | 10 | 15 A | 14 AWG |
| 1-1/2 HP | 10 | 12.5 | 15 A | 14 AWG |
| 2 HP | 12 | 15 | 15 A | 14 AWG |
| 3 HP | 17 | 21.3 | 25 A | 10 AWG |
| 5 HP | 28 | 35 | 35 A | 8 AWG |
| 7-1/2 HP | 40 | 50 | 50 A | 6 AWG |
| 10 HP | 50 | 62.5 | 70 A | 4 AWG |
The wire ratings come from NEC Table 310.16 (copper, 60 C column, the column NM-B cable is rated on), with the 240.4(D) limits on 14, 12 and 10 AWG applied: 14 AWG 15 A, 12 AWG 20 A, 10 AWG 30 A, 8 AWG 40 A, 6 AWG 55 A, 4 AWG 70 A. The standard breaker steps (NEC 240.6) run 15, 20, 25, 30, 35, 40, 45, 50, 60, 70 A. Note that many electricians install a 20 A or 30 A circuit for flexibility, with the matching wire, even when the motor alone would permit a smaller one. That is their judgment, and the wire must always match the breaker.
Distance changes the answer. Voltage drop is 2 x 12.9 x amps x one-way feet divided by the conductor's circular mils (NEC Chapter 9 Table 8), and the planning target is under about 3 percent. A 17 A motor on 10 AWG is fine to roughly 150 ft, then it needs 8 AWG. The 240V circuit calculator runs your horsepower and your length and prints the breaker, the wire gauge and the receptacle. The per-motor pages work the common cases: 3 HP, 5 HP and 7-1/2 HP.
Step 3: Choose the receptacle and plug
The receptacle follows the breaker, and the plug on the machine has to match the receptacle. The site's mapping: a 15 A circuit takes a NEMA 6-15R, 20 A a 6-20R, 30 A a 6-30R and 50 A a 6-50R (the welder receptacle) or a 14-50R, which adds a neutral. The difference between the two 50 A types is the neutral: a 6-series has two hots and a ground, and is right for motors, heaters and welders that need only 240V. A 14-series has two hots, a neutral and a ground, and is right for ranges, RVs and EV chargers that also use 120V. A heavy duty 14-50 receptacle gives the most flexibility. A NEMA 6-50 welder receptacle is the simpler choice if you only need 240V.
Do not use an adapter to make one plug fit another receptacle. The breaker protects the wire, and the wire is sized for the breaker that feeds the receptacle. An adapter that lets a 30 A tool plug into a 50 A receptacle removes the protection. Also, a motor over 30 A or a hard-wired heater is usually connected through a disconnect or hard-wired, not a plug, and an electrician decides.
Step 4: Decide where the outlet goes
Where to put it is the part DIYers get wrong, because the first outlet position is permanent. A good rule is to put the outlet where the machine lives, not where the panel is. Consider:
- The machine's final position in the layout, with the cord reaching without a stretch. Plan the cord length so it never lies across a walkway. Check your plan on the layout page for your bay or in the layout calculator.
- Height. About 48 in above the floor is common for shop outlets, above bench height. For a heater, a ceiling or high-wall outlet near the unit; for a welder, low is fine but away from where sparks fall.
- The car. An EV charger outlet goes at the car's charging port, usually near the front of the bay. Do not place a shop outlet where a car door opens against it.
- A central drop for mobile machines. A machine on a mobile base moves along the wall. A single outlet in the middle of the long wall, or one at each end, serves it. Cord reels such as the DEWENWILS reel are for 120V; do not hang a 240V motor on a cord reel unless it is rated for it.
- Future machines. An outlet where the table saw is now may be where the lathe is later. A pair of outlets in the same box, or a conduit stub you can extend, costs little today.
- Distance from the panel. Each foot of run adds cable cost and voltage drop. A central spot near the panel is cheaper; a far spot may call for a subpanel.
Step 5: Check what the panel can carry
A 240V circuit is only possible if the panel has room for a double-pole breaker and the service has capacity for the new load. This is where the electrician does a load calculation under the NEC for the whole house, not just the garage. Things that make it harder: a full panel (no spaces), an older fuse box, a main breaker already near its limit because of an electric range, dryer, heat pump or EV charger, and an aluminum service feeder. Bring a photo of the panel, the main breaker's amp rating and the list of machines. A Klein CL120 clamp meter lets you check running current on existing circuits, but do not open a panel with it if you are not trained.
When the garage needs several circuits or the run is long, the usual answer is a subpanel in the garage fed by one larger breaker in the house panel. The layout engine suggests a 60 A subpanel for the woodshop packages in 12 x 20, 20 x 20 and 22 x 22 ft garages and 100 A for the larger 24 x 24 and 32 x 24 ft woodshops. A Siemens main-lug load center is the type of part involved. See how many amps for a garage workshop.
Receptacles, cable, subpanel and meters
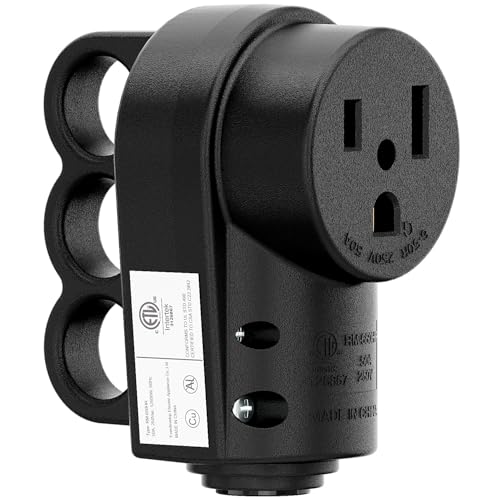


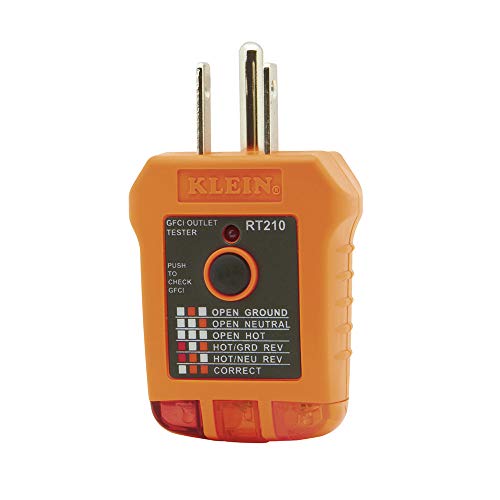
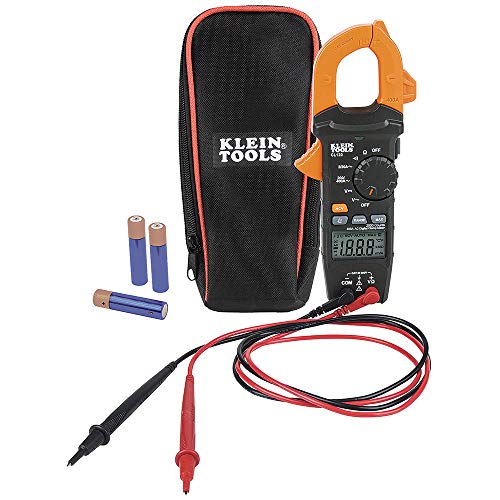
Prices change often; the button shows today's price on Amazon.
Step 6: The typical work an electrician does
So you can read a quote, here is the sequence for a typical new 240V garage outlet, described at a general level:
- Confirm the load, the panel capacity and the route.
- Pull the permit if the jurisdiction requires one.
- Turn off the main, verify the panel is dead and install a double-pole breaker of the specified size.
- Run the cable or conduit from the panel to the outlet location. Cable (NM-B, for example) is allowed in many dry locations; conduit is common in garages where the cable is exposed to damage, and it makes later changes easier. A 6 AWG, three-conductor NM-B such as Southwire 6/3 is the sort of cable a 50 A, 14-50 circuit uses.
- Mount the box and install the receptacle with the correct conductors, ground and, for the 14-series, neutral. Torque the terminals to the manufacturer's value.
- Label the breaker and the outlet.
- Test with a meter and an outlet tester, load the circuit, and call the inspector.
Recent editions of the NEC require ground-fault protection for many receptacles in garages, including some 240V ones. The rules differ by edition and by what your jurisdiction adopted, so ask the electrician. A basic plug-in tester such as the Klein RT210 checks wiring faults on 120V receptacles only; a 240V receptacle needs a meter. You can verify the finished outlet, but let the inspector be the final word.
Common mistakes
- Buying the machine, then the circuit. A machine that needs 240V sits idle for weeks if the circuit is not ready. Plan the outlet first.
- Using a dryer outlet or a range outlet for a tool. Those circuits are sized and protected for the appliance. Do not adapt one to another.
- Sharing a circuit. A heater is a continuous load and a charger is a continuous load; each wants its own circuit.
- Undersized wire on a long run. Voltage drop makes motors run hot and hard. Check it with the voltage drop calculator.
- Skipping the permit. It can void an insurance claim and make selling the house harder.
- Using an extension cord as the circuit. A 240V extension cord is a temporary fix, not a plan.
When you are ready for the next step, the outlet install cost calculator helps you compare quotes, and how to set up a workshop in a garage puts the outlet in context.
Get the garage shop planning checklist
One printable page: measure the bay, count the circuits, list the machines, check the floor. Plus a few short emails, then a couple a month at most.
Unsubscribe anytime. You can also just read the checklist on this site.Frequently asked questions
How do you install a 240V outlet in a garage?
Decide the load, size the breaker and wire from NEC Table 430.248 and Table 310.16, pick a matching NEMA receptacle, run cable from the panel, and have it permitted and inspected. A licensed electrician should connect the panel end.
What breaker and wire for a 240V garage outlet?
A 3 HP motor at 230V draws 17 A, so a 25 A breaker and 10 AWG copper. A 50 A outlet for a welder or EV charger uses a 50 A breaker and 6 AWG copper. Always match the wire to the breaker.
Where should I put a 240V outlet in my garage?
Where the machine will live, about 48 in above the floor, with the cord reaching without crossing a walkway. Near the panel is cheaper, but the machine position matters more. Consider a second outlet or a conduit stub for future machines.
Can I install a 240V outlet myself?
Some places allow homeowner electrical work with a permit and an inspection, and others require a licensed electrician. The panel connection is the risky part. Check with your building department.
Do I need a permit for a 240V garage outlet?
Almost always. A new circuit is usually a permitted job with an inspection afterward. Skipping it can cause problems with insurance and with selling the house.
This page is researched guidance, not professional electrical, engineering or safety advice. Circuits, loads and clearances depend on your house, your service and your town: have a licensed electrician confirm any wiring, and check local code and each manufacturer's manual before you act.