Guides
How to build a workshop in a garage
Build a garage workshop in this order: empty the room and fix water, seal and insulate the shell, run the electrical rough-in (dedicated circuits, a subpanel if needed), finish the walls and ceiling, hang lights, treat the floor, then build benches and storage last.
Insulation comes before the heater because a typical 22 x 22 ft garage needs about 15,500 BTU per hour at 10F outside with R-13 walls and a bare ceiling, but only about 7,500 with R-19 walls, an R-30 ceiling and an insulated door (our heat-loss convention). Pull permits for new circuits and have a licensed electrician confirm the wiring.
Is this a build-out or a set-up?
Setting up a workshop means moving tools into the room you have. Building one means changing the room: insulation, wiring, walls, floor and fixed benches. Most people need some of each. The question to answer first is how permanent the shop is. If you rent, or you expect to sell the house soon, build with things that come off the wall: mobile bases, freestanding benches, plug-in light strips. If you own and plan to stay, the money goes into the shell and the wiring, because those are the parts that make every machine work better. This guide covers the build-out sequence. For picking machines and arranging them, read how to set up a workshop in a garage.
Before any work, check three things. First, the rules: building permits for new circuits and for structural changes, HOA covenants, and your insurer's view of a shop. These are local and general information is no substitute for a phone call; see can I open a shop in my garage for the questions to ask. Second, the car: decide whether the vehicle stays, which changes every dimension, using the park-the-car calculator. Third, the budget: the garage shop budget planner totals the machines and the build-out together.
Step 1: Empty the room and deal with water first
Take everything out, even for one weekend. You cannot judge a space full of boxes, and you cannot insulate behind a shelf. While it is empty, look for the problems that ruin a build-out:
- Water. Look for stains at the base of the walls, efflorescence on the slab, and a floor that slopes toward the wall instead of the door. Fix gutters, grading and flashing before any finish goes up. A shop built over a wet slab rusts every machine you own.
- Cracks in the slab. Hairline cracks are normal. A crack with one side higher than the other is not, and a heavy machine over it will rock.
- Pests and gaps. Seal where the sill plate meets the slab and where pipes and wires pass through the wall.
- Combustion appliances. A gas water heater or furnace in the garage needs combustion air and must stay accessible, with clearances for fuel and sparks. Do not box it in, and keep a carbon monoxide alarm nearby.
Then measure the clear interior, the ceiling height to the lowest obstruction and the door opening. A one-car garage is typically about 12 x 20 or 12 x 22 ft clear with a 9 ft door; a two-car is 20 x 20 to 24 x 24 ft with a 16 ft door; our three-car reference is 32 x 24 ft. Pick the matching layout page to see how much a shop fits before you commit to a build plan.
Step 2: Seal and insulate the shell
Insulation is the cheapest permanent improvement in a garage, and it is the one that makes the heater, the mini-split and the dehumidifier smaller. The site's heat-loss convention uses these U-values in BTU per hour per square foot per degree F: an uninsulated wall 0.25 against 0.09 for R-13 and 0.06 for R-19; an uninsulated ceiling 0.25 against 0.035 for R-30 and 0.026 for R-38; a steel door 0.7 against 0.25 for an insulated one; air leakage of 0.5, 1 or 2 air changes per hour for tight, average or leaky. Applying that to each garage at 55F inside and 10F outside gives:
| Garage | Typical shell | Upgraded shell | Bare, leaky at -10F |
|---|---|---|---|
| 12 x 20 ft | 8,500 BTU/h | 4,000 | 19,000 |
| 12 x 22 ft | 9,000 BTU/h | 4,500 | 20,000 |
| 20 x 20 ft | 13,000 BTU/h | 6,000 | 28,000 |
| 22 x 22 ft | 15,500 BTU/h | 7,500 | 34,500 |
| 24 x 24 ft | 17,500 BTU/h | 8,500 | 39,000 |
| 32 x 24 ft | 24,500 BTU/h | 11,500 | 52,000 |
Typical means R-13 walls, a bare ceiling, a steel door and average leakage. Upgraded means R-19 walls, an R-30 ceiling and an insulated door. The slab edge loss is ignored on purpose, and these are convention values, not measurements of your garage: run your own numbers in the heater calculator.
The order of work matters. Air seal first: caulk the plates, foam the penetrations, add weatherstripping around the door. Then the walls, then the ceiling, then the door. A kit such as the NASA TECH reflective foam core kit for a two-car door or the Reach Barrier kit for a single door is the quickest win, since the door is the biggest single opening. Be careful in the ceiling: if there is living space above, check fire-rating requirements with your building department before you add or remove anything, and never block the vents of a gas appliance.
Step 3: Run the electrical rough-in
Electrical rough-in happens while the walls are open, which is why insulation and wiring are planned together. Decide the circuits now:
- Lighting circuit. A dedicated 15 or 20 A circuit for the shop lights, separate from the outlets, so a tripped saw does not leave you in the dark.
- General-purpose outlets. 20 A circuits with GFCI protection, with outlets about 48 in above the floor, above bench height, every 4 to 6 ft along the work walls.
- Dedicated machine circuits. One per big motor. NEC Table 430.248 gives single-phase full-load current: a 1-1/2 HP motor is 20 A at 115V or 10 A at 230V, a 2 HP is 24 or 12 A, a 3 HP is 34 or 17 A. The conductor is sized at 125 percent (NEC 430.22) from the 60 C copper column of NEC Table 310.16: 14 AWG for 15 A, 12 AWG for 20 A, 10 AWG for 30 A, 8 AWG for 40 A, 6 AWG for 55 A.
- 240V circuits. For a 3 HP cabinet saw or collector, a heater, a welder or a large compressor. The 240V circuit calculator gives the breaker, wire and receptacle.
- A subpanel if the run from the house is long or you need more than four or five circuits. The workshop amps calculator suggests a size; our layout engine lands at 60 A for the woodshop packages that fit a 12 x 20, 20 x 20 and 22 x 22 ft bay, and at 100 A for the larger 24 x 24 and 32 x 24 ft shops.
Conduit costs more than cable but lets you add or change wires later without opening a wall, which is the right choice in a shop that will grow. A Siemens main-lug load center is the kind of part an electrician fits in the garage. Get at least two written quotes, tell each one the full machine list, and ask whether your service can carry it. The 240V guide and the outlet cost calculator help you be a better customer. Voltage drop on a long run is calculated with NEC Chapter 9 Table 8 values and held under about 3 percent; the voltage drop calculator checks it.
Have a licensed electrician confirm the design and connect the panel. Many places allow homeowner work only with a permit and inspection; others do not allow it at all.
Step 4: Finish the walls and ceiling
Drywall is not required for a shop, but a finished wall is brighter, cleaner and easier to hang things on. Use 5/8 in Type X drywall on the wall shared with the house and on a ceiling with living space above if your code calls for it; ask the building department. Then cover the work walls with plywood or OSB, a full sheet at a time, screwed into the studs. That gives you a surface you can screw a cabinet or a French cleat into anywhere, with no stud-finding. 3/4 in plywood is a common choice for the wall behind a bench.
Paint the walls and ceiling white or a very light color. The lighting convention uses a coefficient of utilization of 0.6, which assumes a bright room; a dark garage needs more fixtures for the same result. A durable semi-gloss cleans easily. Leave the ceiling joists exposed only if the shop is detached or the ceiling has no fire-rating requirement.
If the garage is attached, treat the wall between it and the house as a barrier: seal every gap, use a weather-stripped solid door, and keep the door closed when the machines run. Fine dust and fumes find every crack.
Build-out materials that show up in almost every garage shop
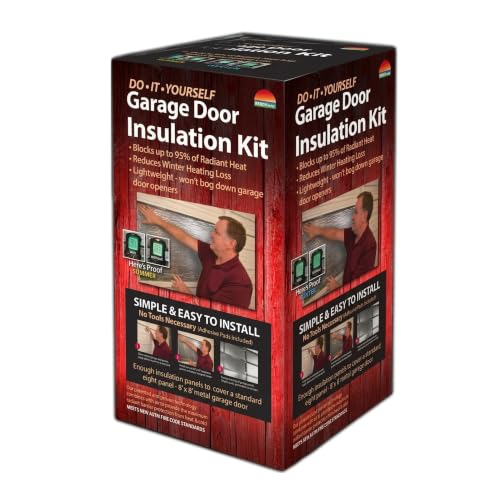


Prices change often; the button shows today's price on Amazon.
Amazon and Grizzly, side by side
Each card shows an Amazon pick and a Grizzly Industrial pick for the same job.
6 ft adjustable workbench

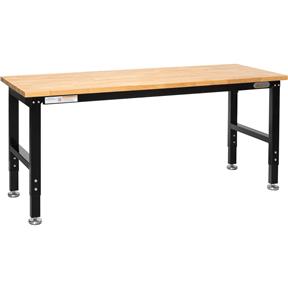
Choose the Amazon bench to keep spending down; choose the Grizzly bench when you run power tools on it every weekend and want the built-in outlets.
Top tool chest

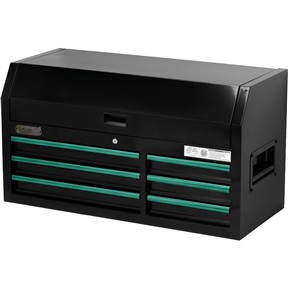
Pick the Amazon cart if you want one rolling unit; pick the Grizzly 42 in top chest if it will sit on a bench or on the matching roller cabinet.
Prices change often and Grizzly runs sales, so the buttons show current prices.
Step 5: Hang the lights
Lights go up after the ceiling is finished and before the floor is done, so you can see what you are doing. The convention is 50 footcandles for general work and 100 for detailed work, with a coefficient of utilization of 0.6 and a light loss factor of 0.85. That is about 98 lumens per square foot for general work. A 12 x 20 ft bay (240 sq ft) wants about 23,500 lumens, roughly six fixtures in the 4,400 lumen class; a 22 x 22 ft bay wants about 47,500, roughly eleven; a 32 x 24 ft bay (768 sq ft) wants about 75,000. A six-pack such as the Elekico 60W 4 ft LED six-pack matches the fixture count for a 12 x 20 ft bay (check the lumens on the listing against the target), and the hykolity 4 ft light is the single-fixture version.
Plan two or three switched zones: the whole room, the bench and the saw, and a task light over the lathe or the drill press. The lighting calculator does the lumens for any bay.
Step 6: Treat the floor
A bare slab is hard on feet, dusty and stained by oil. You have four choices: sealer or paint, epoxy, interlocking tiles or mats. Paint and epoxy need a clean, dry, profiled slab and fail from moisture coming up through it, so test for moisture first. Interlocking tiles such as the VEVOR 12 in tiles (a 50 pack covers 50 sq ft per the listing) need no prep, hide a rough slab and can be pulled up. An anti-fatigue mat such as the Vergo industrial mat in front of the bench and the saw saves your back. Do not put a mat where a machine rolls, or under a mobile base. See the best garage shop floor covering.
Whatever you choose, keep the slab slope toward the door in mind. Shim machines to level rather than trying to level the floor. A heavy bench on a floor tile needs a hard under-surface, so check the load rating.
Step 7: Build the benches and storage last
Benches and storage come last because the rest of the build-out would damage them. Build or buy the workbench to the height of your standing elbow, about 63 percent of your height by the site's ergonomic convention, and roughly 7 in below the elbow for general work and 11 in below for heavy work. The workbench height calculator does the math, and workbench height for a garage shop explains it. Depth and length depend on the bay; read workbench size for a one-car garage.
If you buy rather than build, compare the CAMMOO 48 in adjustable bench, the Betterhood 70 in and the VEVOR 72 in hardwood top against the Grizzly T34010 4 ft, T34011 6 ft and T10157 oak workbench. See the best garage workbench. Hang a metal pegboard above it, put a 5-tier steel shelf on the nearest wall, and get a rolling chest (Goplus or VEVOR, or the Grizzly T34658 top chest with the T34659 roller cabinet). Fix a vise to the bench, a 5 in swivel vise for metal or a woodworking vise for wood.
Step 8: Add climate control and air cleaning
Heat and dust come after the shell, because they are sized to it. A garage that goes from the typical shell to the upgraded one in the table above drops from 15,500 to 7,500 BTU per hour in a 22 x 22 ft bay, which is the difference between a 4.5 kW and a 2.5 kW electric heater at 240V. An electric heater avoids combustion in a room with a car and fuel. Gas unit heaters need venting and combustion air. Read is a garage heater worth it and how to hang a garage heater, then use the mini-split calculator if you want one system that heats and cools.
Dust collection is its own project: how to set up dust collection in a garage shop. Plan the duct path before the ceiling is closed if you are running a fixed system. The Grizzly G0738 hanging air filter (260, 362 and 409 CFM, per the listing) and the POWERTEC AF4001E are the two filtered-air units the layout engine uses.
How long and how much work this is
A realistic schedule for one person working weekends: the emptying, repairing and sealing takes a weekend or two; insulation and drywall take two to four weekends depending on the size; the electrical rough-in is an electrician's day or two, plus a wait for the permit and inspection; painting and the floor take a weekend each; benches and storage take as long as you want them to. A full build-out of a two-car garage is a season, not a weekend. A shop you can work in is usually ready long before every finish is done, so sequence the work and keep the shell and wiring ahead of the cosmetics.
The cost drivers are the size of the garage, the amount of electrical work, the insulation type, and whether you do the labor. We do not quote prices for local labor because no honest number exists without a quote. The Amazon items on this page carry budget tiers, and the setup pages total whole shops.
Get the garage shop planning checklist
One printable page: measure the bay, count the circuits, list the machines, check the floor. Plus a few short emails, then a couple a month at most.
Unsubscribe anytime. You can also just read the checklist on this site.Frequently asked questions
What is the first step in building a workshop in a garage?
Empty the garage, look for water problems and fix them, then measure the clear interior. Water, slab cracks and combustion appliances change the whole plan, so find them before any material is bought. Then check permits and covenants.
Do I need to insulate a garage workshop?
It is the highest-value step. Our heat-loss convention shows a 22 x 22 ft garage dropping from about 15,500 to 7,500 BTU per hour with R-19 walls, an R-30 ceiling and an insulated door, which halves the heater you need.
How many circuits does a garage workshop need?
One lighting circuit, a few 20 A GFCI outlet circuits, and a dedicated circuit for each big motor. A subpanel makes sense when you need more than four or five. A licensed electrician should confirm the design and pull the permit.
Should I drywall a garage workshop?
It brightens the room and gives a clean surface. Walls shared with the house, and ceilings under living space, often need fire-rated drywall under code, so ask the building department before you start.
What is the best floor for a garage workshop?
Interlocking tiles need no prep and can be removed. Epoxy looks good but depends on a dry slab. Add anti-fatigue mats where you stand, and never put mats under mobile bases.
This page is researched guidance, not professional electrical, engineering or safety advice. Circuits, loads and clearances depend on your house, your service and your town: have a licensed electrician confirm any wiring, and check local code and each manufacturer's manual before you act.